A joint trajectory execution example
Visit our learning platform AICAdemy for an interactive training module with a real robot on this topic:
Launcher configuration requirements
This example makes use of the built-in Joint Trajectory Controller (JTC) and the generic six-axis robot.
Use AICA Core v4.4.2 or higher.
Setting up the application
Launch AICA Studio and create a new application by pressing "Create new".
Copy the following YAML and generate the graph.
JTC example application
schema: 2-0-4
dependencies:
  core: v4.4.2
frames:
  start:
    reference_frame: world
    position:
      x: 0.372464
      y: 0.048147
      z: 0.43
    orientation:
      w: -0.000563
      x: 0.707388
      y: 0.706825
      z: 0.000001
  waypoint_1:
    reference_frame: start
    position:
      x: -0.2
      y: 0
      z: 0
    orientation:
      w: 1
      x: 0
      y: 0
      z: 0
  waypoint_2:
    reference_frame: start
    position:
      x: 0
      y: 0.2
      z: 0
    orientation:
      w: 1
      x: 0
      y: 0
      z: 0
  waypoint_3:
    reference_frame: start
    position:
      x: 0.2
      y: 0
      z: 0
    orientation:
      w: 1
      x: 0
      y: 0
      z: 0
on_start:
  load:
    hardware: hardware
hardware:
  hardware:
    display_name: Hardware Interface
    urdf: Generic six-axis robot arm
    rate: 100
    events:
      transitions:
        on_load:
          load:
            - controller: robot_state_broadcaster
              hardware: hardware
            - controller: joint_trajectory_controller
              hardware: hardware
    controllers:
      robot_state_broadcaster:
        plugin: aica_core_controllers/RobotStateBroadcaster
        events:
          transitions:
            on_load:
              switch_controllers:
                hardware: hardware
                activate: robot_state_broadcaster
      joint_trajectory_controller:
        plugin: aica_core_controllers/trajectory/JointTrajectoryController
        events:
          predicates:
            has_trajectory_succeeded:
              application: stop
          transitions:
            on_load:
              switch_controllers:
                hardware: hardware
                activate: joint_trajectory_controller
graph:
  positions:
    on_start:
      x: 460
      y: 0
    stop:
      x: 460
      y: 660
    buttons:
      button:
        x: 40
        y: 840
    hardware:
      hardware:
        x: 680
        y: -20
  buttons:
    button:
      display_name: Set desired trajectory
      on_click:
        call_service:
          controller: joint_trajectory_controller
          hardware: hardware
          service: set_trajectory
          payload: |-
            {
              frames: [start, waypoint_1, waypoint_2, waypoint_3, start],
              durations: [2.0]
            }
  edges:
    hardware_hardware_joint_trajectory_controller_has_trajectory_succeeded_on_stop_on_stop:
      path:
        - x: 440
          y: 780
        - x: 440
          y: 700
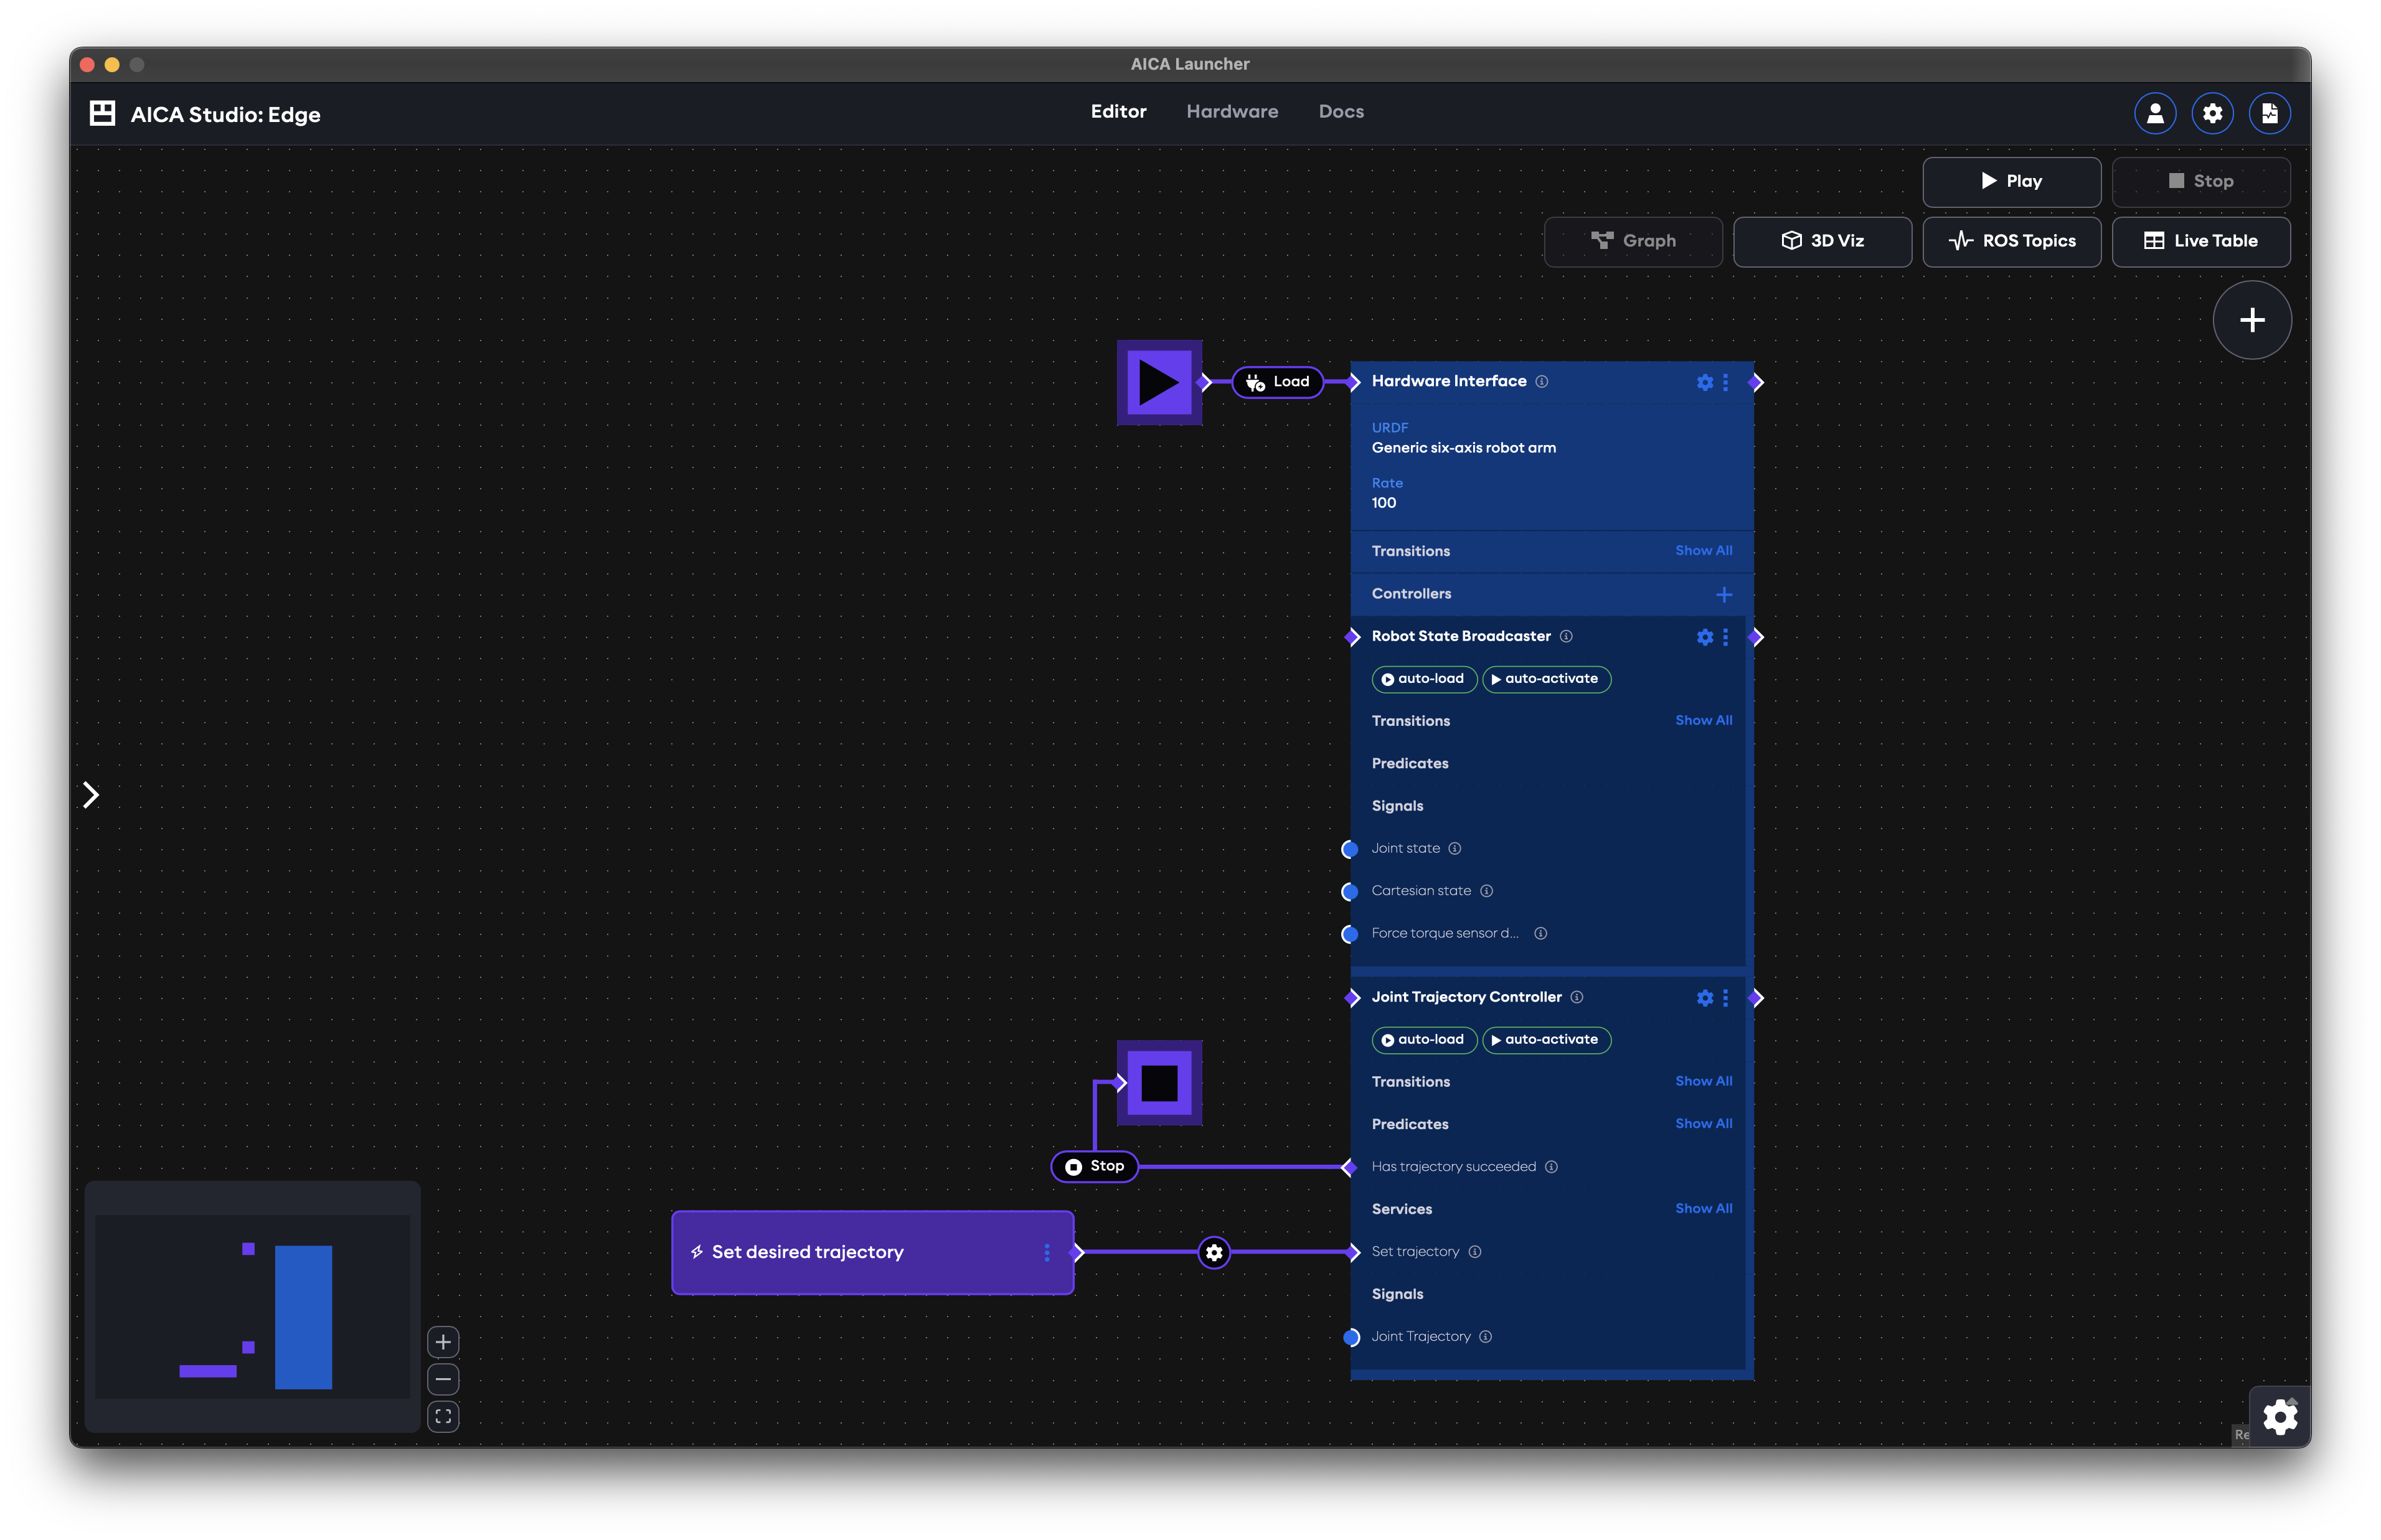
The application graph should show a hardware interface with a Joint Trajectory Controller and an event trigger, as shown
below:
The example explained
The application starts by loading the Robot State Broadcaster and Joint Trajectory Controller for the generic
six-axis robot. You may already play the application.
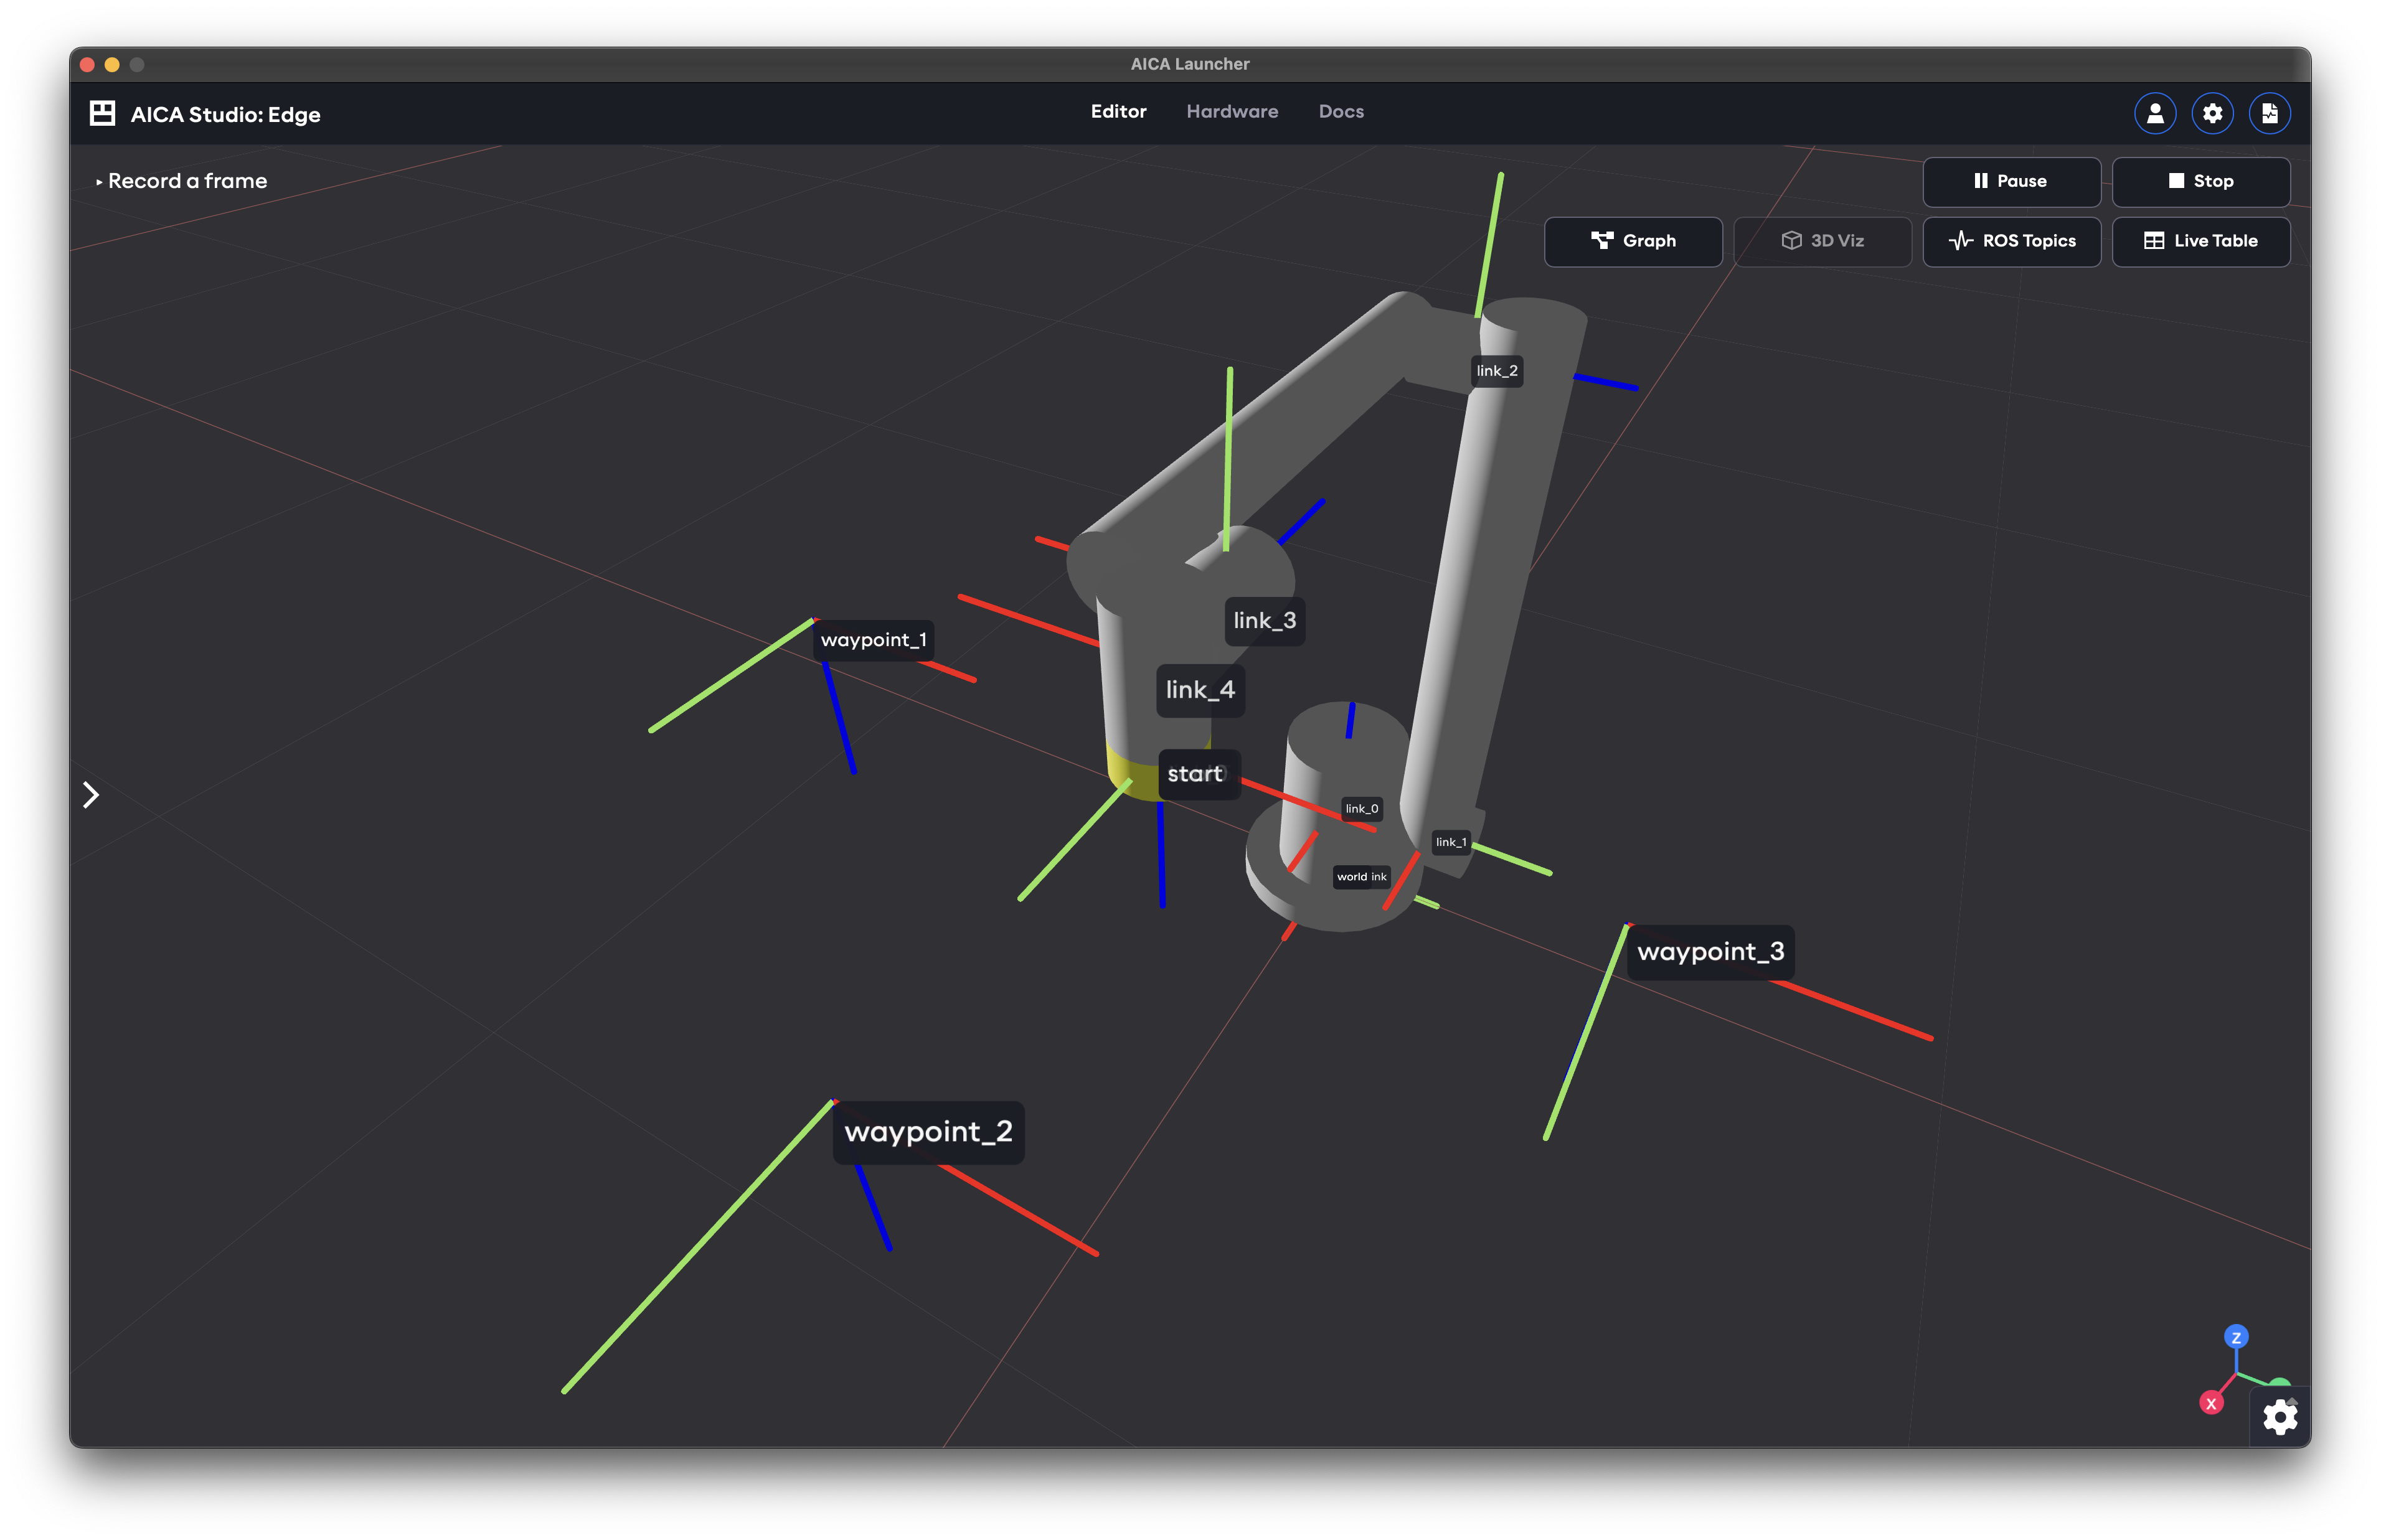
After you press play, switch to the 3D view using the corresponding button on the top right of your AICA Studio. You should see your robot in its default joint configuration, along with 4 Cartesian frames named start, waypoint_1, waypoint_2, and waypoint_3 that form a triangle. As you may have guessed, this application controls the robot such that it traverses the Cartesian frames in that order.
For now, let us go back to the graph view. Once there, turn your attention to the trigger button that connects to the
Set trajectory service of the Joint Trajectory controller. Click on the gear icon on the edge that connects the button
to the controller. You will see the following service payload:
{
  frames: [start, waypoint_1, waypoint_2, waypoint_3, start],
  durations: [2.0]
}
This message defines 2 of the variables that JTC can use in order to execute a trajectory, namely:
frames: a list of the Cartesian frames that you would like to traverse, in the order that they should be visited.durations: a list of absolute durations (in seconds) that correspond to each waypoint.
Ensure the durations vector is either of the same length as frames or has a single element which will be used for
all waypoints. You can also validate your payload's frame names, by verifying they match with those shown in the 3D view
or YAML application. This way, you can intuitively anticipate the trajectory execution.
Executing the trajectory
Assuming you have already pressed play and you are currently in the graph view, go ahead and press the trigger button to start the execution of the trajectory. Switch to the 3D view to see the robot moving through the waypoints.
That is all you need to move your robot along predefined poses! Once the trajectory is executed, a predicate is set and the application will automatically stop.
Take the time to experiment with different times and/or frame order. While the application is stopped, you may also go into 3D view and drag the waypoints around such that you alter the trajectory.