CameraStreamer component
AICA's core-vision package includes, among others, the CameraStreamer component that can read image streams from
USB devices, network streams, or video files. Most of the standard consumer-grade webcams and video formats are
supported out-of-the-box.
This guide shows the basics on how to use the component with a camera.
Working with a video file or network stream is also possible by providing the filepath or network address instead of a camera device.
AICA Launcher configuration
Start AICA Launcher, select AICA Core v4.4.2 or higher, and add the core-vision package to your configuration.
Select Launch AICA Studio to proceed.
Using the CameraStreamer
Start by creating a new application.
- Remove the hardware interface that is included in new applications by default.
- From the
Scenemenu, use theAdd Componenttab and look for the Camera Streamer component either by searching or by manually going under theCore Vision Componentsmenu. Click to add it to the graph. - Next, connect the component to the start block.
- Enable auto-configure and auto-activate.
- With your new component selected, make sure you are in the
Scenemenu, where you may find all the available component parameters.
By this point, you should have something like the following:
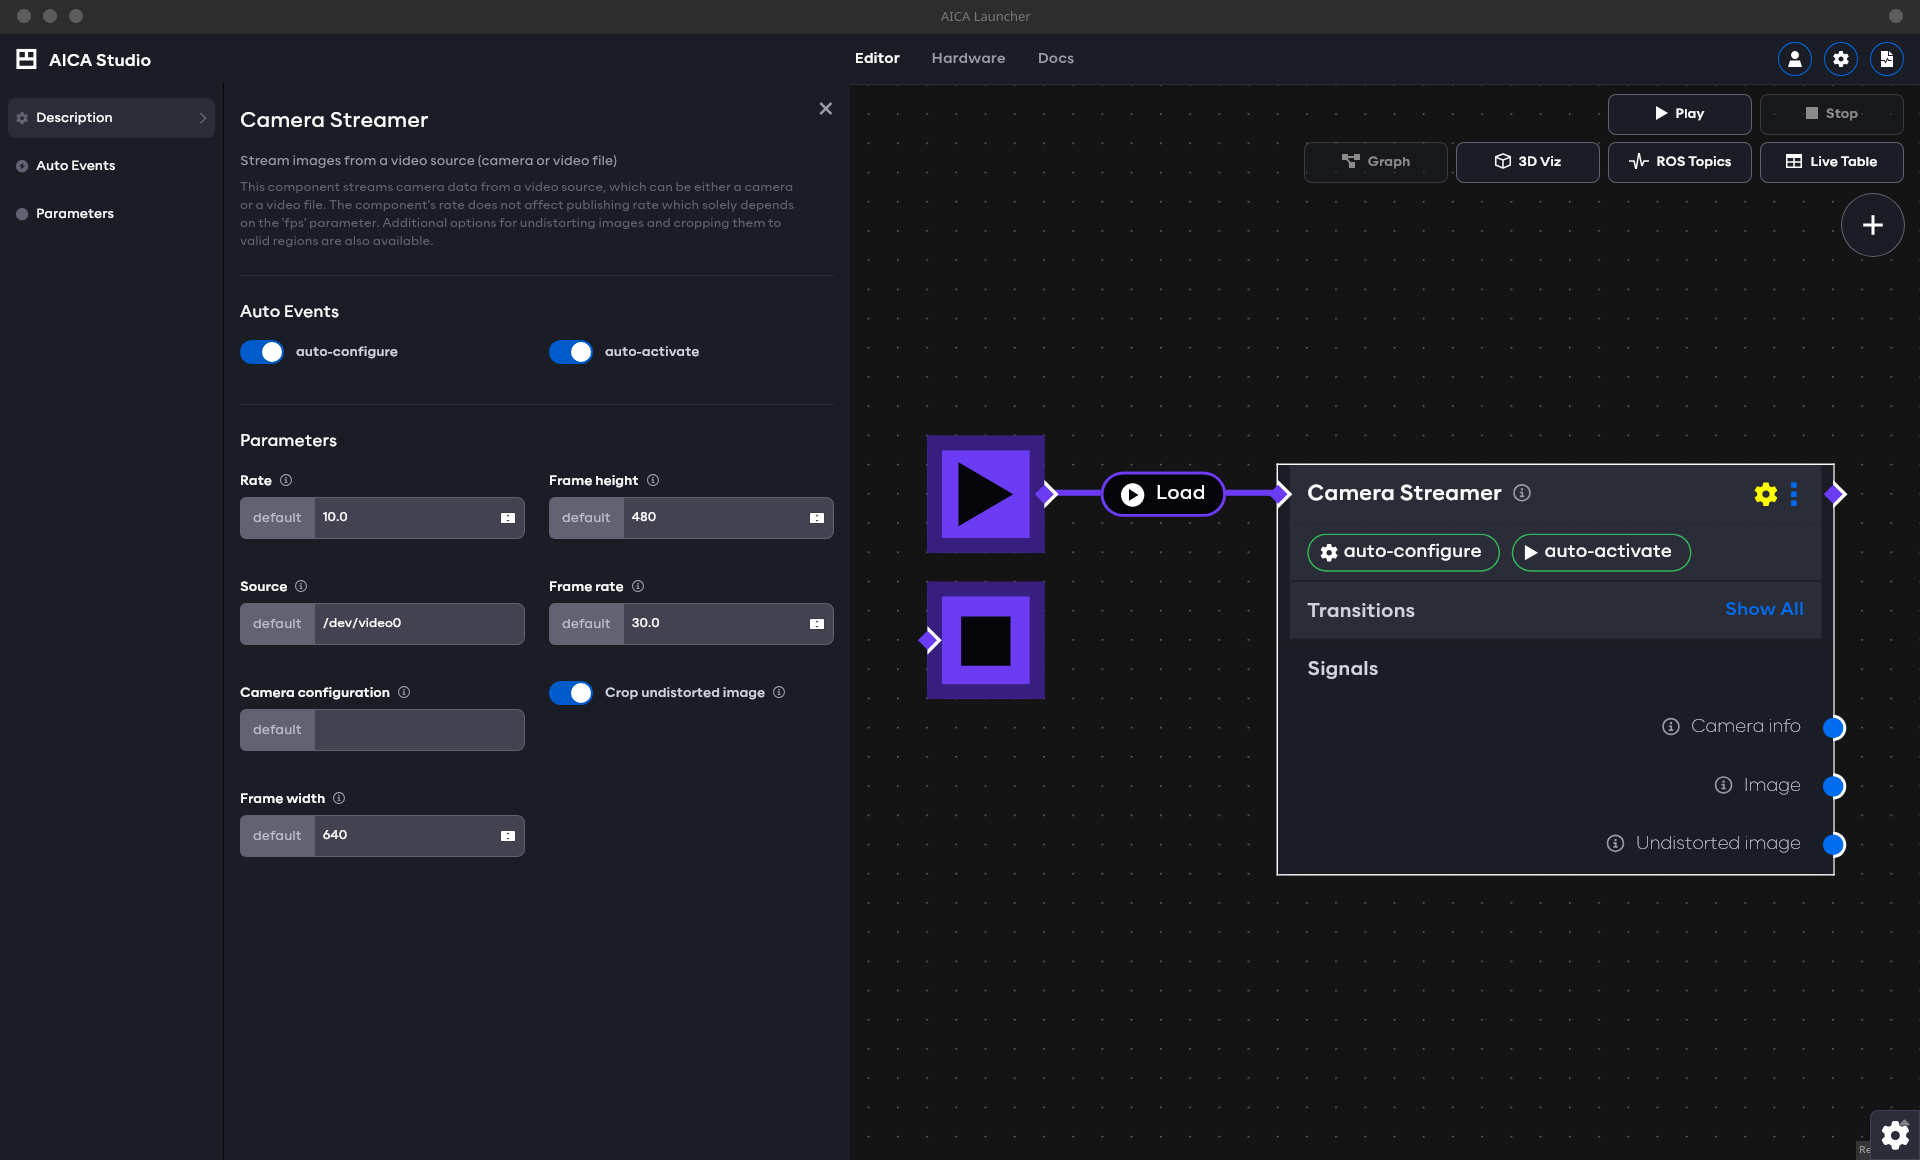
Before pressing play, let us go through the parameters first. You should see:
- Rate: This is the component's rate, but it has no effect on the operation of
CameraStreamer. - Source: Path to the source device or video file. If using a camera, this is typically of the form
/dev/videoX, whereas for video files you need to provide the absolute path to the video, e.g.,/path/to/video. - Camera frame: The reference frame that will be used when publishing image messages, which should correspond the camera's sensor position.
- Camera configuration: A YAML-formatted camera configuration file containing the camera intrinsics (optional). If you don't have a calibration file for your camera, you can follow our calibration guide.
- Frame width: The desired image width.
- Frame height: The desired image height.
- Frame rate: The desired frame rate for image streaming.
- Crop undistorted image: If a camera configuration file is available, this option indicates whether black-pixel regions created at the edges of the image post-undistortion should be cropped. Mind that this also crops part of the image that contains usable pixels.
The image width and height are not used to resize an existing stream. In the case of camera devices, they will act as desired dimensions, but the component will fail to configure if they are not supported. For videos, the native resolution should be set.
Similarly, the frame rate is also a request and will cause the component to fail configuration if the value requested is not supported.
In newer versions of CameraStreamer you will also have access to:
- Stream encoding: Sets the output encoding of the image stream.
Once you have selected an appropriate source:
- Press Play to start the application.
- To see the live camera feed, click on the gear icon on the bottom right and select Launch RViz.
- In RViz, select Add > By topic > /camera_streamer/image > Image. This adds a panel that shows the live image. The undistorted image (if available) can also be found under /camera_streamer/undistorted_image > Image.
Steps 2 and 3 are only available on Linux as they require Docker to forward graphics to the host machine. However, you should still be able to create image streams with connected devices for further use in your application graph.
You may use the following YAML snippet containing the full application:
Application YAML
schema: 2-0-4
dependencies:
  core: v4.4.2
on_start:
  load:
    component: camera_streamer
components:
  camera_streamer:
    component: core_vision_components::image_streaming::CameraStreamer
    display_name: Camera Streamer
    events:
      transitions:
        on_load:
          lifecycle:
            component: camera_streamer
            transition: configure
        on_configure:
          lifecycle:
            component: camera_streamer
            transition: activate
graph:
  positions:
    components:
      camera_streamer:
        x: 280
        y: -20